Toyota Highlander trunk mount
admin | 30.11.2025
3D Preview
Loading 3D model...
LMB: Rotate | Scroll: Zoom | RMB: Pan
Gallery (6)

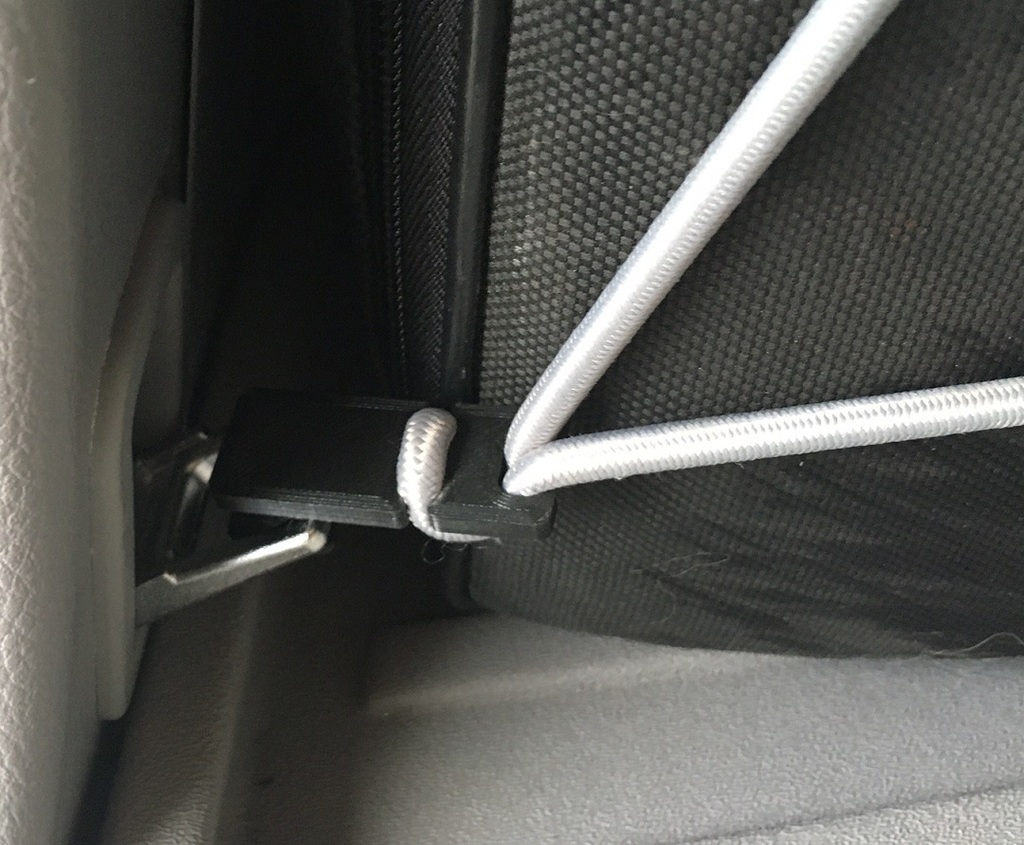
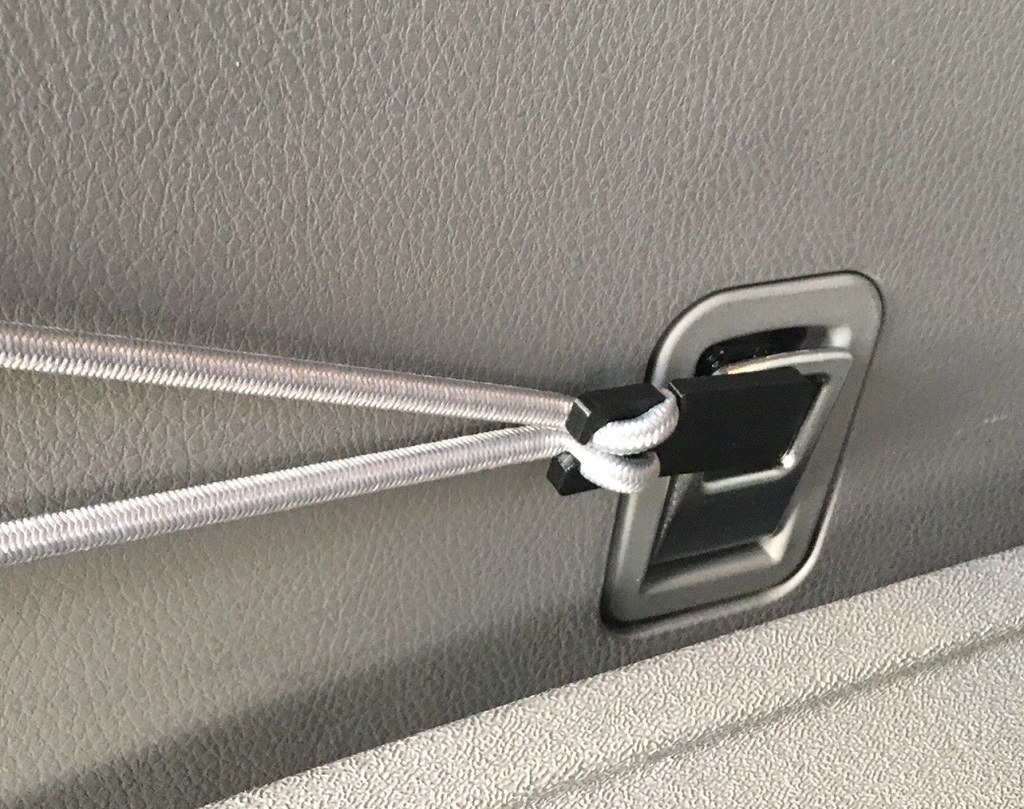
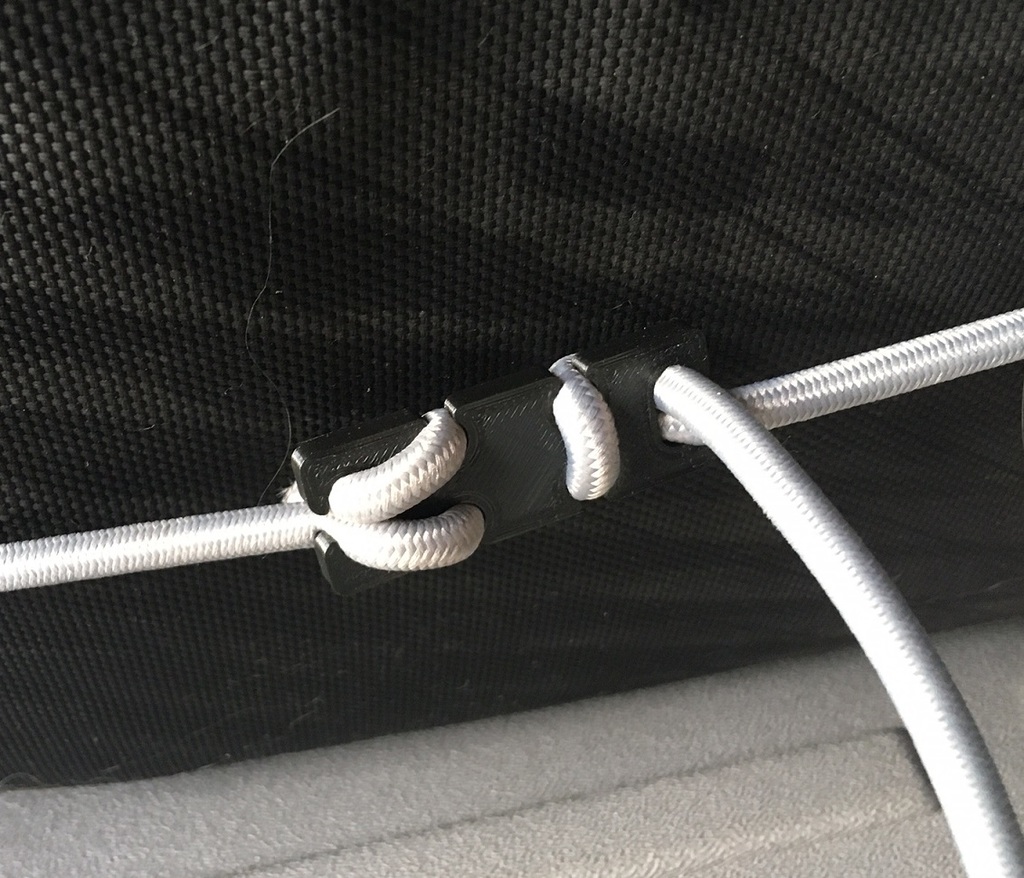


I recently purchased a 2017 Toyota Highlander LE Plus and was looking for a good way to secure a few small items in the rear cargo area. There are a few options for cargo nets that cover the rear or bottom of the compartment, but I wanted something to tie small items to the side of the compartment to keep them from sliding around without preventing the rear seats from folding down or taking up too much floor space. There are 4 folding cargo anchors at the rear of the floor, as well as two T-hooks higher up at the rear. The front-most cargo hooks are in the path of the rear seats and, when fully open, prevent the seats from folding up or down. I needed a way to use these hooks without having to remove the cargo net before folding the seat. I came up with the idea of making my own low profile hooks that could interact with the anchors while they were still stacked in the compartment wall. The hooks I came up with work well and just clean the seats without any problem. I took 25 feet of 1/4″ bungee cord to make the webbing and all my hooks are sized for that size cord. The diameter of my cord is 5.5 mm, which is a little less than 1/4 inch. This should be enough to secure both sides of the car. You can simply string the bungee cord between the various attachment points, but to get the most out of it, you'll need to create some sort of jumper between the ropes. You can use the included S-clamps to connect the cords together. Or, if you need a more secure structure and have the patience, you can use a double leaf bend knot to join the ropes together. This is not a very difficult knot and it holds well on the elastic cord. To connect the ends of the two cords together, you can use the included 3D printed connector, or a sheet bend, or a more complex knot called a zeppelin bend knot, which is more symmetrical than a double sheet bend. The ends of the cord will become frayed if you simply cut it to the correct length. To prevent this, you can temporarily wrap the cord in tape before cutting it, then heat (flame) seal the ends, or use a piece of heat shrink tubing or some kind of metal clamp or knot to secure the end of the cord. I printed this on a standard Creality Ender3 printer with 0.2mm layer height and 0.4mm line width, 1.2mm wall thickness (3 lines), 1mm top/bottom thickness (5 layers) and 30% cubic PLA infill at a hotend temperature of 205C.
Please login to post comments.
Information
- Author: admin
- Date: 30.11.2025
- Category: Toys & Games
- Views: 44
- Downloads: 39
- Likes: 0
- Images: 6
- Files: 3
Download ZIP
Model Author
Similar models


×
❮
![]() ❯
❯