Snapmaker U1 Feeder Relocation To Rear Position
admin | 06.03.2026
3D Preview
Loading 3D model...
Gallery (19)
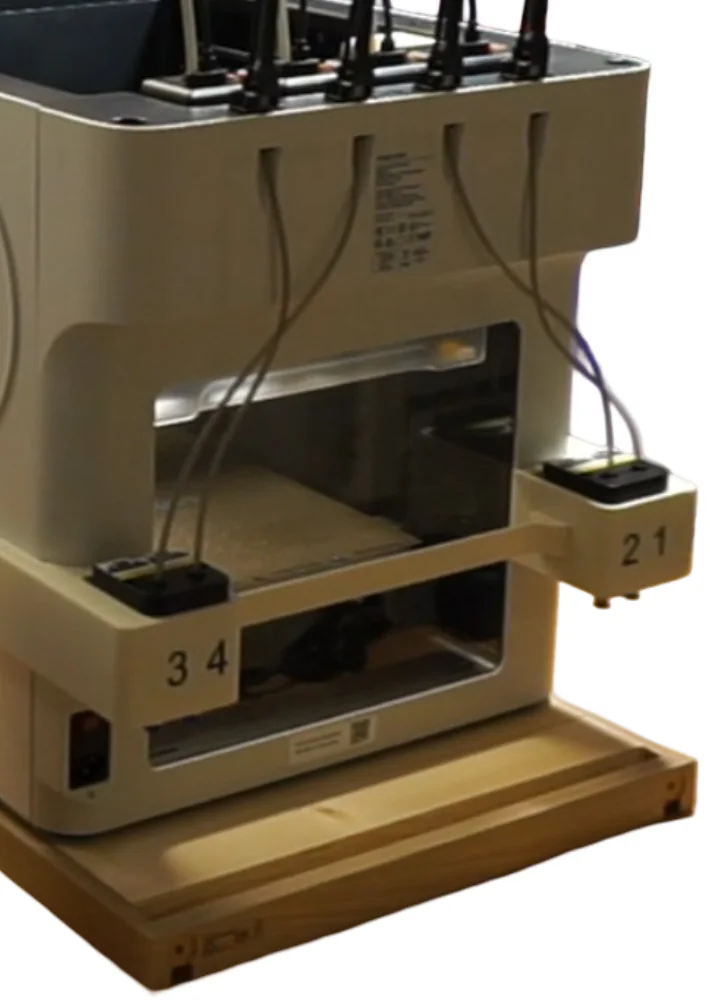
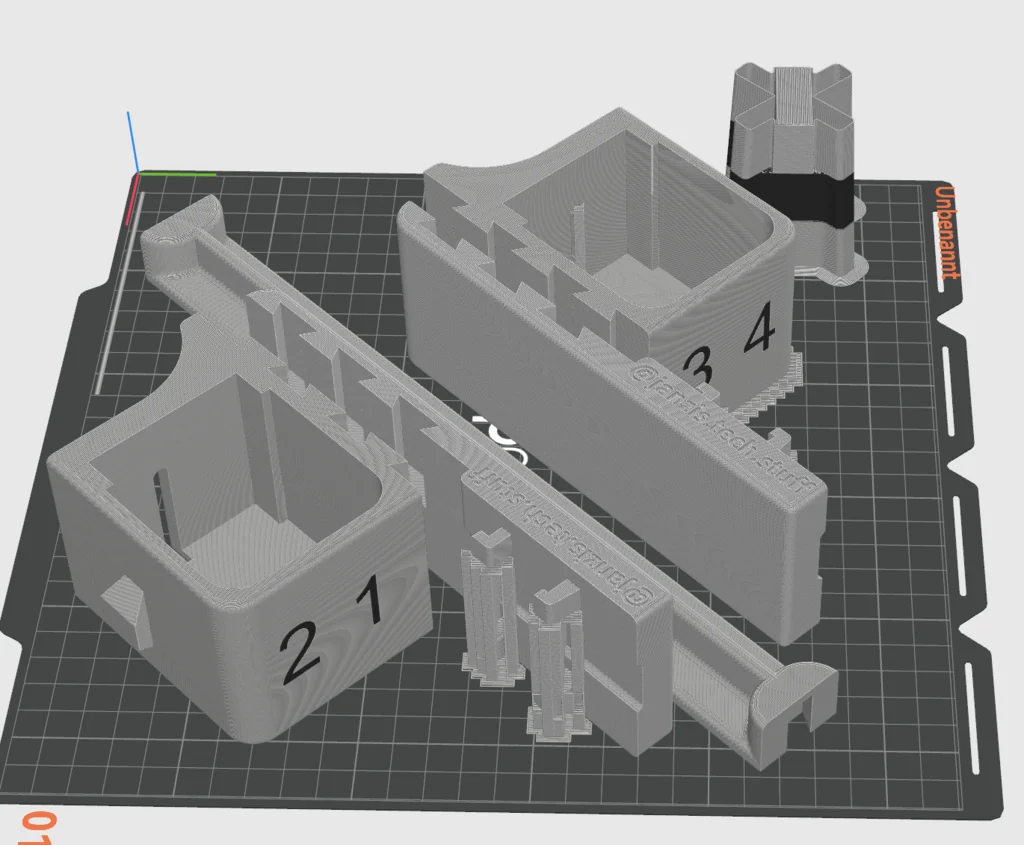
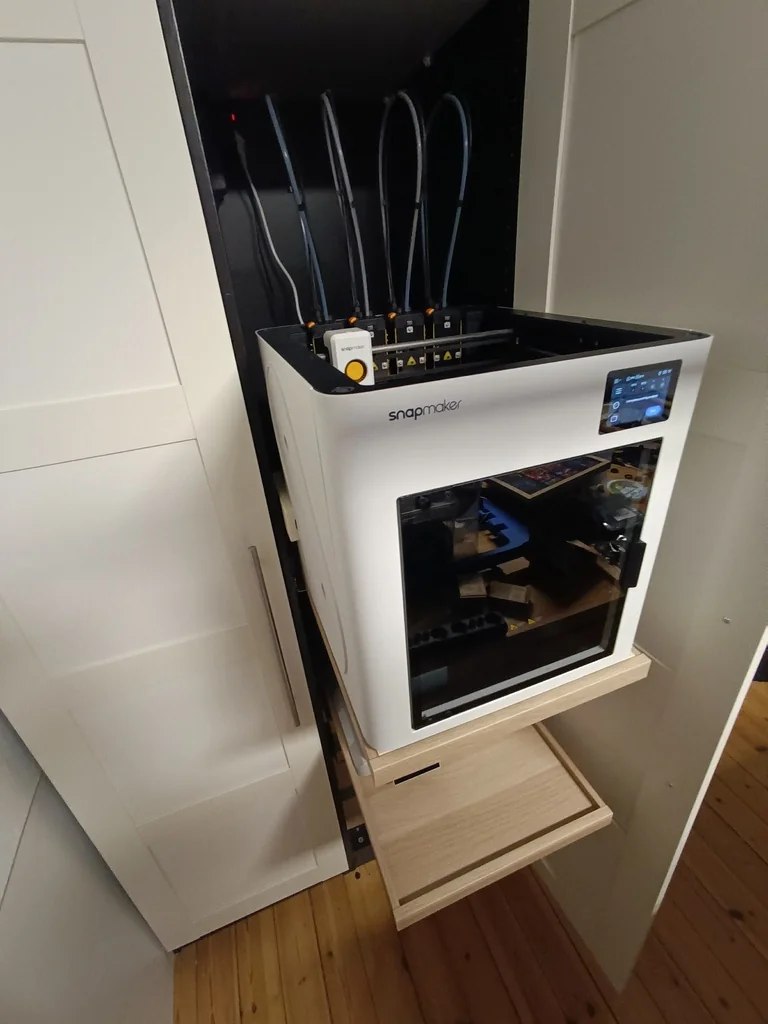
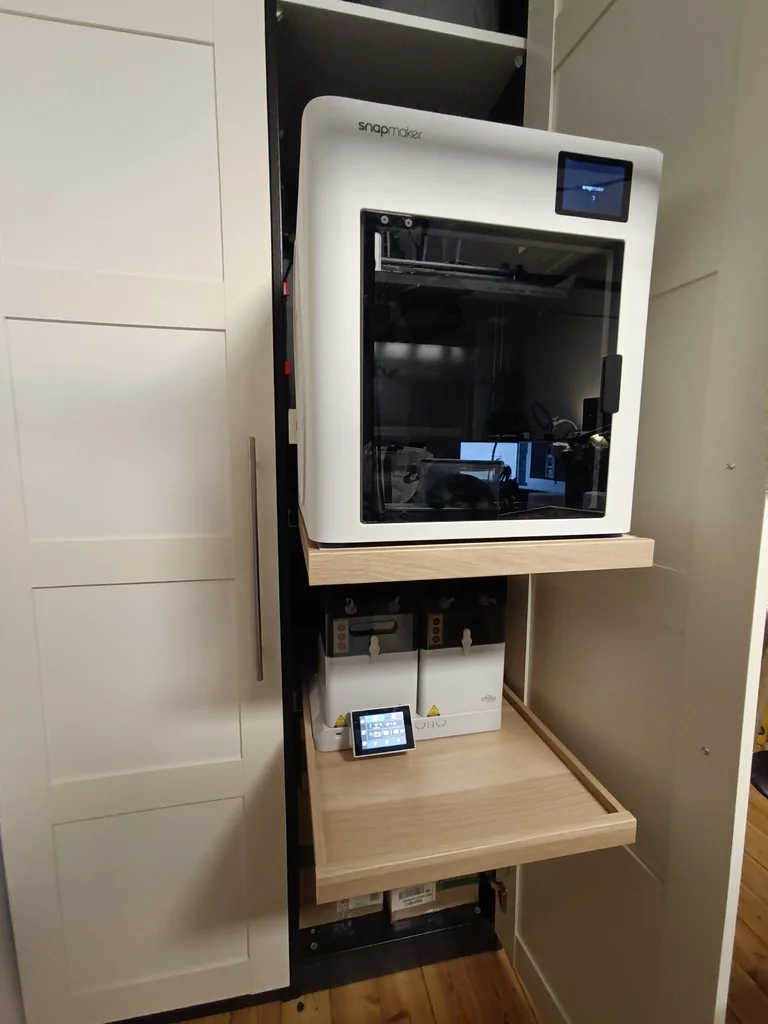
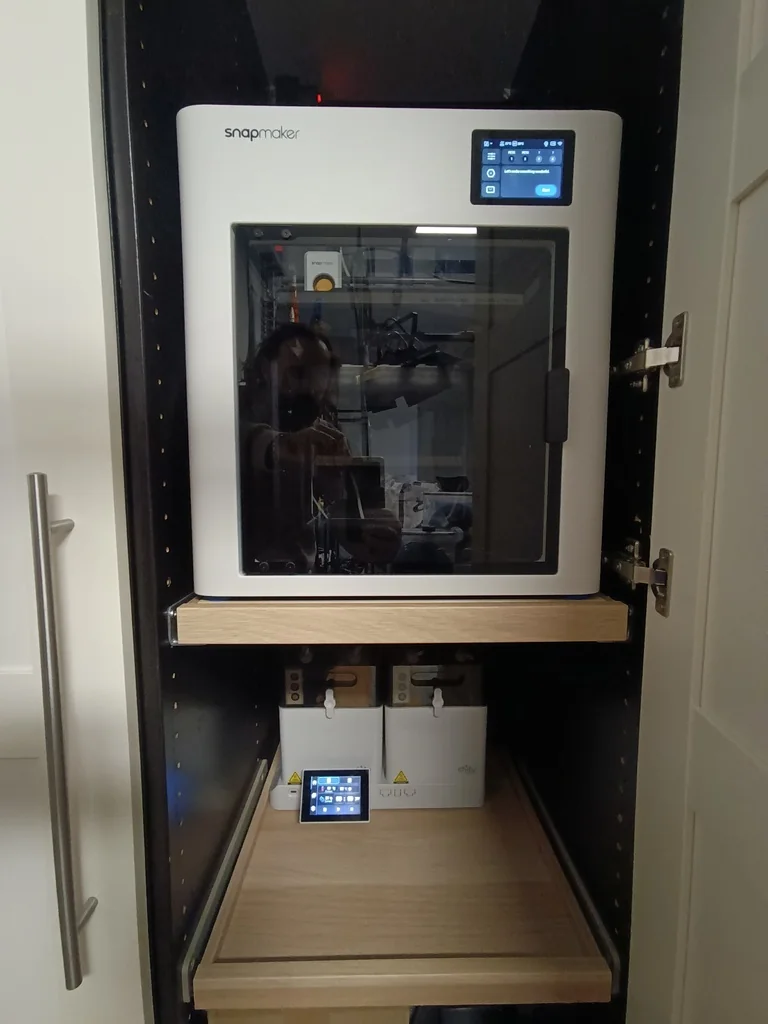
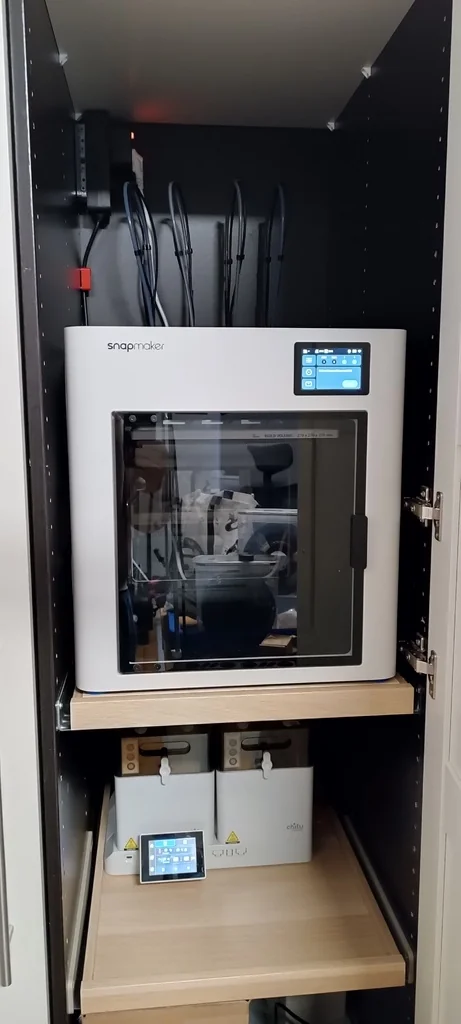
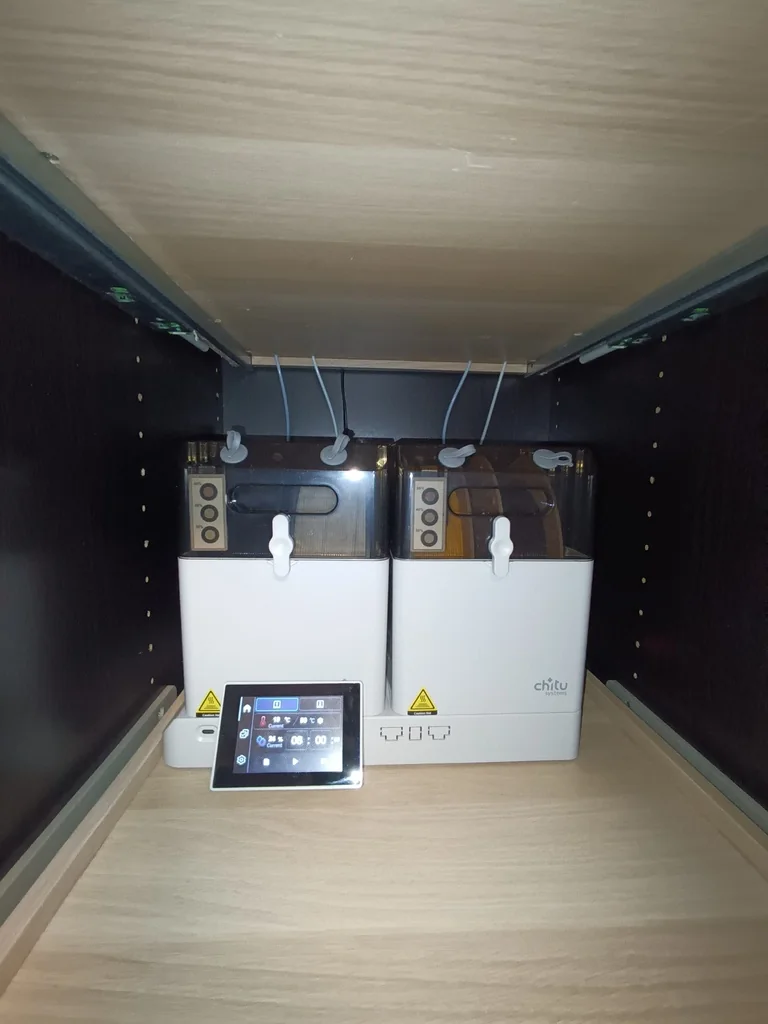
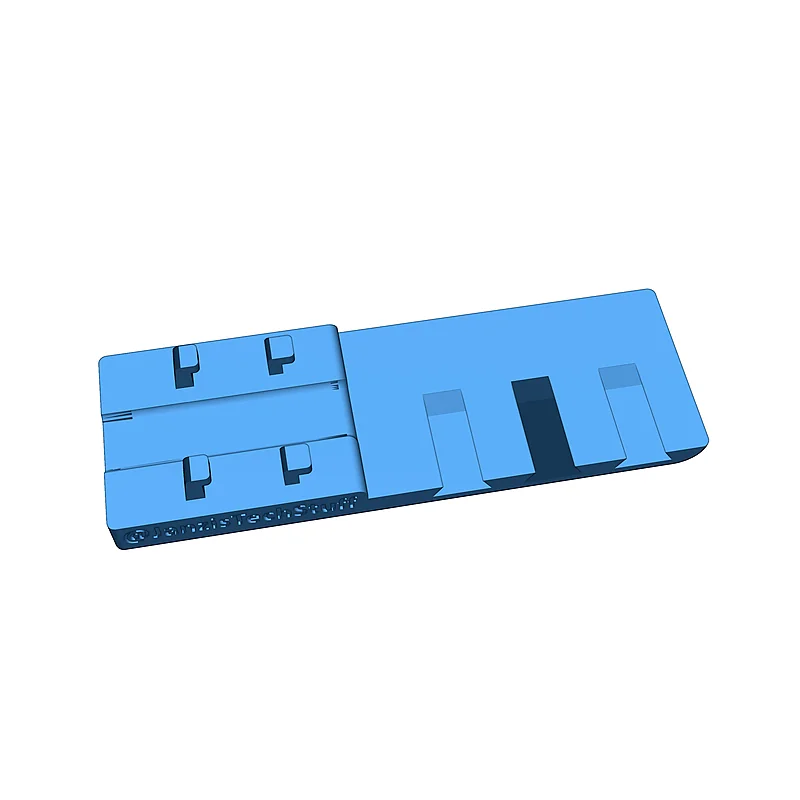
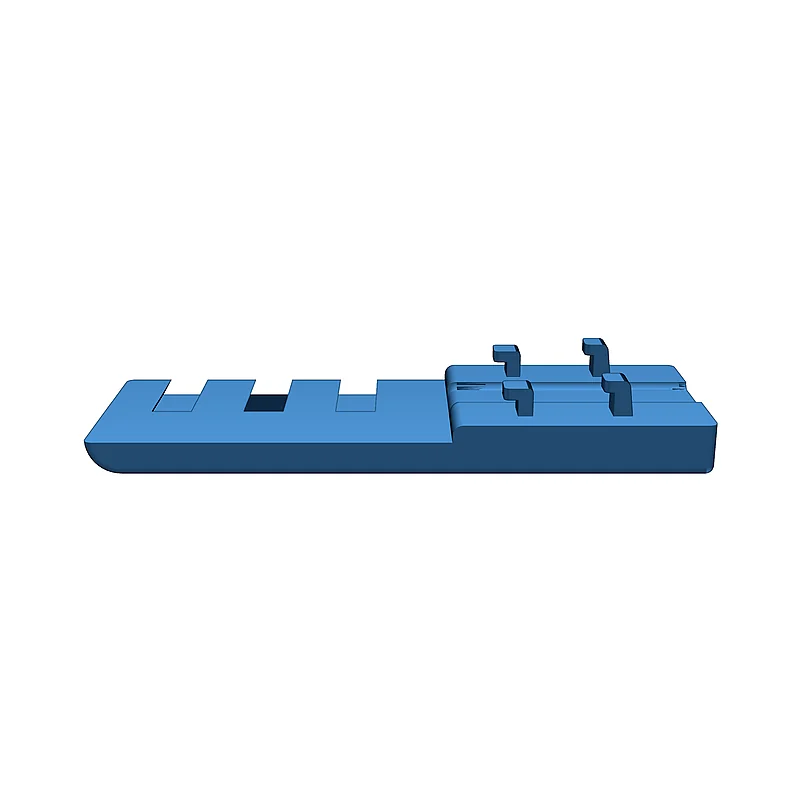

I designed an adapter kit that allows the U1’s feeders to be relocated to the back of the printer. No drilling is required, as the original mounting points of the feeders are used for attachment. This makes it possible to install the printer in a 50 cm PAX cabinet from IKEA or other cabinets of similar dimensions. I use a pull-out shelf for the printer and another pull-out shelf underneath for a Chitu E1 filament dryer, which supplies the filament. The ribbon cables for the feeders need to be rerouted so that their length is sufficient for the modification. For this, the side panels must be removed. Additionally, a configuration adjustment in Klipper is required to account for the shortened feed path (approximately 150 mm). For these adjustments, I use the custom firmware from paxx12 [ ]. Download the latest release file (U1 extended ...bin), copy it to a FAT32-formatted USB drive, and connect it to the printer. Then navigate on the touchscreen to Settings → About → Firmware → Local Update and select the file. The update process takes a few minutes, and the printer will restart afterward. Check the IP address under Wi-Fi or LAN mode and use it to connect to Klipper (Fluidd) through your browser. In the interface, switch to the Config menu. Then navigate to the subfolder extended/Klipper. At this location, create a new .cfg file. I named it feeders.cfg. Add the following lines to this document: [filament_feed left] preload_length: 800 [filament_feed right] preload_length: 800 The original settings will now be overridden with these values. The original values are 950. Now regarding the models: I have uploaded a 3MF file for both Bambu Studio and OrcaSlicer. I highly recommend using the Orca version if you plan to print the adapter kit with the U1. If you are using a Bambu-compatible printer, please use the Bambu 3MF file in Bambu Studio instead. I have also included the OBJ files, if you want to use them. However, in that case, you will need to configure supports, wall thickness, and orientation yourself. The dovetail guides work best when printed in a vertical orientation. The adapters for the side mounts should be printed with at least three wall lines, as the full weight will later hang from the four hooks. I printed all parts with PLA; PETG should work just as well, although I haven’t tested it. Additionally, you will need four PTFE push-fit connectors with 4–5 mm long M6 threads to complete the assembly. I uploaded a tutorial on YouTube, currently only in German. If there’s demand, I’ll make an English voiceover as well. Let me know. I’ll also be publishing a tutorial soon on how to relocate the display on the Chitu E1. I’ll post an update here once the upload is finished. This is my first upload. I would appreciate a like or boost if my contribution helps. I am also open to suggestions and comments. Janzi Настройки печати и инструкции
-
FeederHolder_Connector.objDownload
-
FeederHolder_Left.objDownload
-
FeederHolder_Right.objDownload
-
BottomPlate.objDownload
-
BambuStudio_Snapmaker_U1_Feeder_Relocation__Rear_Position.3mfDownload
-
OrcaSlicer_Snapmaker_U1_Feeder_Relocation__Rear_Position.3mfDownload
-
FeederHolderMount_Left.objDownload
-
FeederHolderMount_Right.objDownload
Please login to post comments.
Information
- Author: admin
- Date: 06.03.2026
- Category: 3D Printing
- Views: 15
- Downloads: 33
- Likes: 0
- Images: 19
- Files: 8
Download ZIP